I've been away for a bit. The holidays happened and my birthday. Lots of stuff has happened in the last 2 months. The biggest thing is me finally admitting I have a problem with depression and getting help for it. Things are still fairly unstable. Some good days, some very bad days (weeks even) but I'm in contact with my doctor regularly and everything. A lot of it is a guess&waiting game.
On the worse days, the only things I can do to keep going is to play minecraft, listen to nightcore and occasionally draw some My Little Pony fan art.
My Sleepy OC by ~Akki14 on deviantART
I only really got into drawing the ponies because a friend gave me an OC on my birthday. For some reason, I could suddenly draw ponies much better than previously.
My Ivanpony Plushie Finally Arrived! yay by ~Akki14 on deviantART
So... not really much to say. Still alive and surviving. It's a little hard to feel like it today but I am much better than before, I think. I'm considering this as a long vacation. Slightly uncomfortable but trying to chill out.
Wednesday, February 6, 2013

Sunday, December 9, 2012
Longcat Scarves
A little over a year ago, I got a strange request from my sister to make a longcat scarf. How long should a longcat scarf be? I decided very long... but also I was on a budget so I bought 2m of fleece but made 4m of scarf.

It was a lot of scarf.
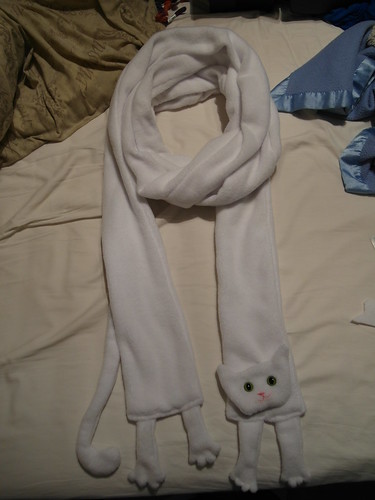
Decided after that epic scarf, I'd make one for myself but leave it at a more sensible 2m.
Been wearing it around for a while and then someone said to me... hey you could probably sell those. Hm. Interesting. I'll think about it.
A few weeks later, someone else asks if I made the longcat scarf and if they could commission one as a gift. Okay I'll think about it. This time I actually sat down, figured out material costs and time costs and came up with a reasonable number that didn't seem insane. I ask commissioner of scarf if the price was okay and they said it was reasonable so off I went making scarves.
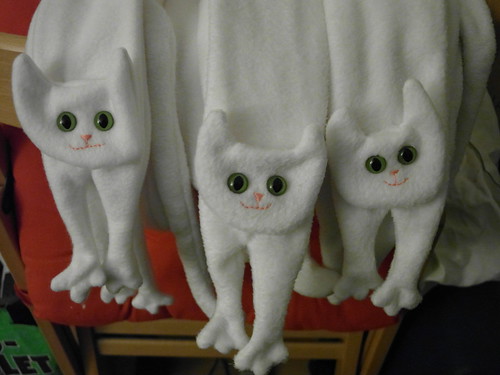
Two of the above are now spoken for -the third is on ebay awaiting a good home. Third has been sold, made another one, put it on ebay, friend bought that one.
I've got a few plans for possible Tacgnol/Longcat combinations but I'll wait and see how these do first.
It was a lot of scarf.
Decided after that epic scarf, I'd make one for myself but leave it at a more sensible 2m.
Been wearing it around for a while and then someone said to me... hey you could probably sell those. Hm. Interesting. I'll think about it.
A few weeks later, someone else asks if I made the longcat scarf and if they could commission one as a gift. Okay I'll think about it. This time I actually sat down, figured out material costs and time costs and came up with a reasonable number that didn't seem insane. I ask commissioner of scarf if the price was okay and they said it was reasonable so off I went making scarves.
Two of the above are now spoken for -
I've got a few plans for possible Tacgnol/Longcat combinations but I'll wait and see how these do first.
Friday, December 7, 2012
Laser cut rings and Plastic Weld
Apparently back in October I forgot to write about some laser cut rings I made.
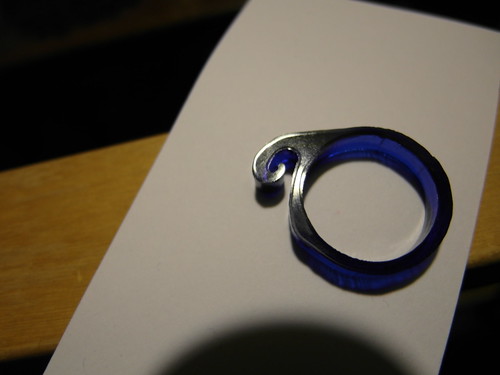
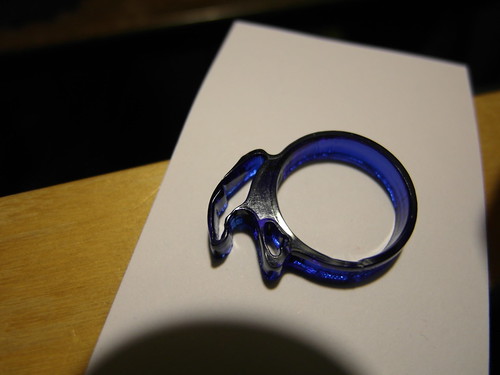
A friend happened to be in the space after I made these and gave me some tips since they're a bit melted. Need to use less power and multiple passes next time.
More recently I learned of Plastic Weld which is a solvent that you use to "glue" (chemically melt & fuse) acrylic together. Just tried it out on a random 5mm mirrored perspex dot I've been keeping around since the prototype for the Infinity Box.
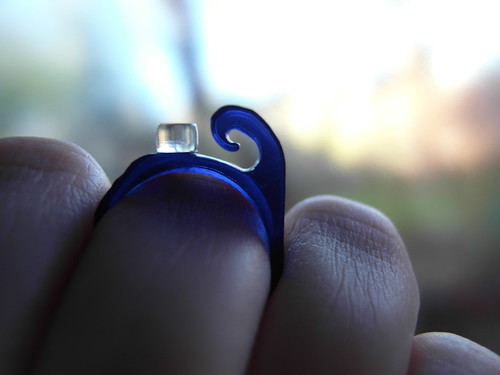
So awesome. So easy. Just hold the pieces in place with one hand, use a small brush to brush the Plastic Weld into the join and it wicks along by capillary action. Done in seconds. This basically means I can make boxes... or whole cases like those in galleries! This is exciting news, especially as I'm too lazy to design boxes with all those tabs or little slots for bolts & nuts (as in the design for the Ice Tube Clock).
A friend happened to be in the space after I made these and gave me some tips since they're a bit melted. Need to use less power and multiple passes next time.
More recently I learned of Plastic Weld which is a solvent that you use to "glue" (chemically melt & fuse) acrylic together. Just tried it out on a random 5mm mirrored perspex dot I've been keeping around since the prototype for the Infinity Box.
So awesome. So easy. Just hold the pieces in place with one hand, use a small brush to brush the Plastic Weld into the join and it wicks along by capillary action. Done in seconds. This basically means I can make boxes... or whole cases like those in galleries! This is exciting news, especially as I'm too lazy to design boxes with all those tabs or little slots for bolts & nuts (as in the design for the Ice Tube Clock).
Saturday, December 1, 2012
Shrinky Plastic Fun :D
Kate is a bad influence on me. Or a good one, I'm not sure which anymore... She made me discover many My Little Pony merchandise, like colouring books. One of the things she used the colouring books for was to transfer pony designs to shrinky plastic (known as Shrinkles in the UK and Shrinky Dinks in the US).
Lately I've seen a lot of MLP jewellery designs using the shrink plastic so I wanted to give it a try. What can be better than infinite pony fan art?
First, I tried to trace a really big Fluttershy... The instructions said it shrinks 7 times smaller. So I measured before
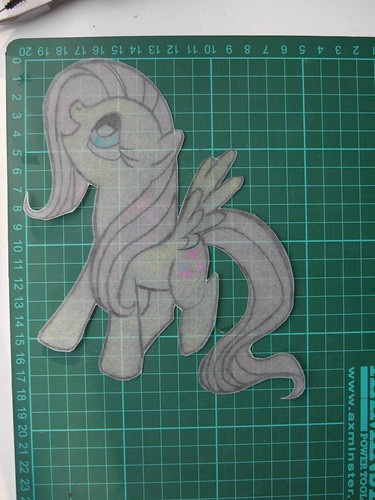
(look at those impressive tracing, colouring and cutting skills!)
And after
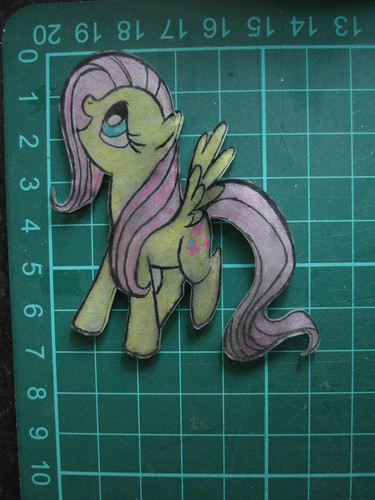
And found it really only shrinks down by 2.5 times or so (thanks to Kimball for using MATHS to work this out for me because my brain was slow and addled by plastic fumes).
I realised after making the Fluttershy that ponies don't have black outlines, so I made this Pinkie Pie
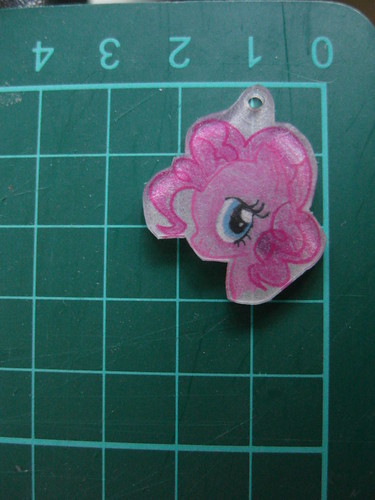
I really love her expression in this one. From the original I traced, her head was more down and she was much more shy looking but this is still lovely and I'll probably make it into a necklace for myself soon.
Figured to try something a bit smaller... Gummy! Pinkie Pie's pet toothless alligator.
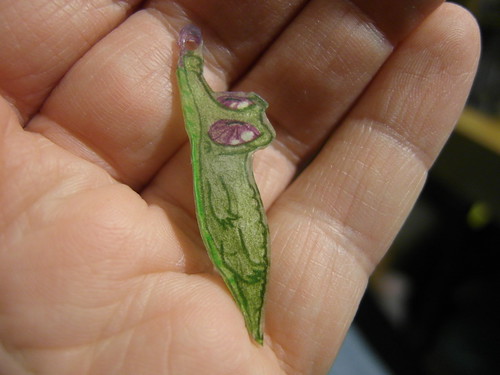
Would have been a little better if it was a little bigger so you can see he's hanging onto something by his mouth.
and even smaller...
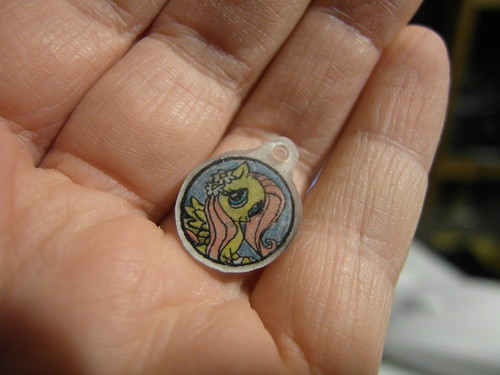
Copied from a mini colouring book, it was a sort of illumination on a games page. Still the most pretty tiny thing ever.
I'm sure I could come up with more ideas for this stuff and I bought quite a bit of shrinkles too. One idea that has come to mind is possibly ... mouse-sized butterfly wings. Combining the mouse taxidermy with the Rarity's wings from Sonic Rainboom MLP... Might be interesting. Or just pretty and weird. Either way it's good.
Lately I've seen a lot of MLP jewellery designs using the shrink plastic so I wanted to give it a try. What can be better than infinite pony fan art?
First, I tried to trace a really big Fluttershy... The instructions said it shrinks 7 times smaller. So I measured before
(look at those impressive tracing, colouring and cutting skills!)
And after
And found it really only shrinks down by 2.5 times or so (thanks to Kimball for using MATHS to work this out for me because my brain was slow and addled by plastic fumes).
I realised after making the Fluttershy that ponies don't have black outlines, so I made this Pinkie Pie
I really love her expression in this one. From the original I traced, her head was more down and she was much more shy looking but this is still lovely and I'll probably make it into a necklace for myself soon.
Figured to try something a bit smaller... Gummy! Pinkie Pie's pet toothless alligator.
Would have been a little better if it was a little bigger so you can see he's hanging onto something by his mouth.
and even smaller...
Copied from a mini colouring book, it was a sort of illumination on a games page. Still the most pretty tiny thing ever.
I'm sure I could come up with more ideas for this stuff and I bought quite a bit of shrinkles too. One idea that has come to mind is possibly ... mouse-sized butterfly wings. Combining the mouse taxidermy with the Rarity's wings from Sonic Rainboom MLP... Might be interesting. Or just pretty and weird. Either way it's good.
Friday, November 23, 2012
Adventures in Fur - Paws (or Gloves)
Quite a while ago, after a bit of beer, the topic of fursuits came up. For those uninitated, this is what Furries wear... also Furries seem to pay quite a lot of money for these things. So a while back, a friend was threatening to buy some furfeet for 150euros (!) ... I drunkenly texted back NO! I WILL MAKE SOME FOR WAY CHEAPER FOR YOU!
Okay I've still not made the furfeet. I do, however, now have the materials! Then I got sidetracked by the fact that I have quite a lot of fur fabric... hey I could make furry gloves. Hmmm...
This website is the most amazing resource out there http://www.matrices.net/fursuiting.asp Seriously, if you ever needed to know how to put together a whole fursuit or just parts of one, you should look at that website. There is so much useful hints and tips. Stuff like using hair clippers to shave the fur to get more shape and detail seems like common sense to me now but I wouldn't have thought to try it (or thought it was so easy) if it were not for the videos on that website.
Gushing out of the way, I used the tutorial for the fur hands on the Matrices Fursuiting website. I was having one of those days where I really wanted to work on something but felt I couldn't due to lack of some sort of materials... My remit from my friend was black faux leather pads on the paws. I ordered some but was sitting and waiting for it. I looked around the flat and found some very thin, dark dusty blue suede leather. This might do... These may not be paws for my friend but if I made a pair of my own, I can make all the mistakes on these and then do better for friend who bought the fur fabric for me in the first place.
So the furglove making continued. I drew out a rough palm-sized pad and cut it out of leather.
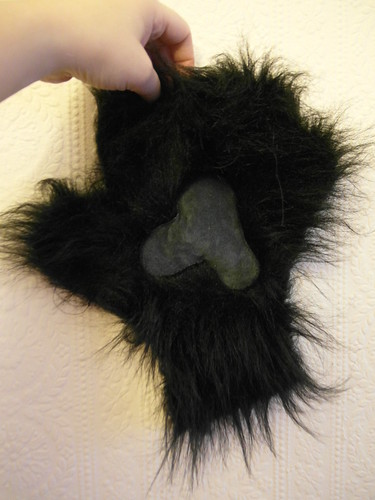
I was surprised my sewing machine could handle the fur fabric and the leather but it seemed fine. I didn't follow through on the tutorial exactly - I went for more of a loose zigzag stitch rather than a satin-style stitching. It still seemed to work out pretty good
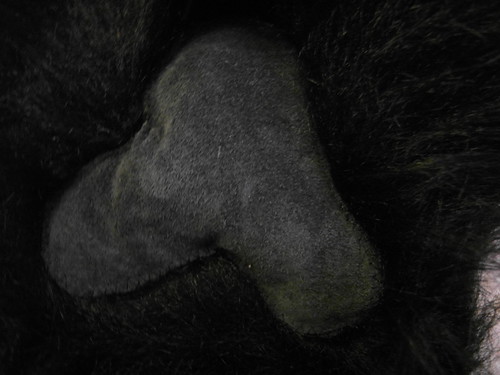
I learned that it's a lot easier to tack down the pads before hitting the sewing machine. Also it leads to slightly less huge bunches of fabric, as the leather sneaks around against the fur which moves around quite a bit.
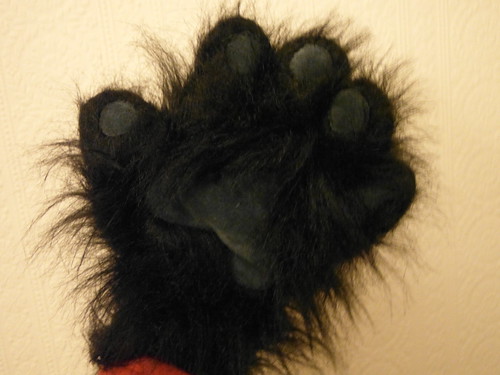
All sewn up and ready for some shaving. I am so thankful I've trained myself to be ambidextrous. I had no problem shaving either glove using either hand. Wearing the glove while shaving with the other hand allowed me to move my fingers around and get more shaping in between the fingers.
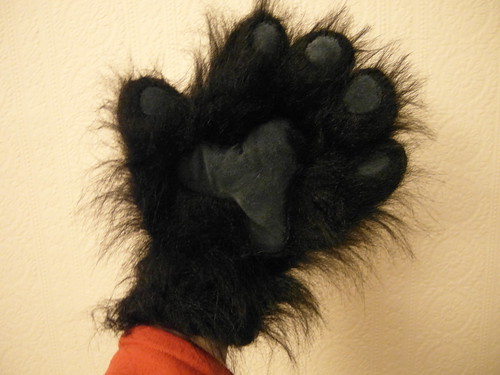
And here's both paws
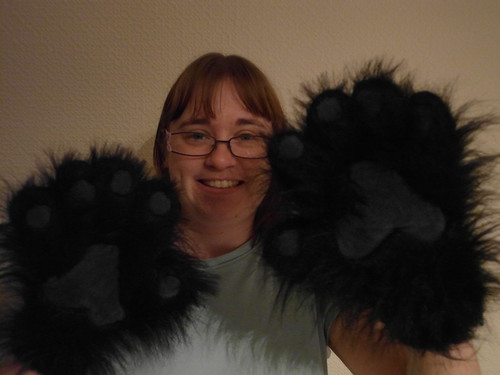
Hopefully I'll be moving onto the furfeet sometime soon... I've basically got the materials together, it's just finding the time to collaborate with friend to make sure shoes fit and final design/shaping.
Okay I've still not made the furfeet. I do, however, now have the materials! Then I got sidetracked by the fact that I have quite a lot of fur fabric... hey I could make furry gloves. Hmmm...
This website is the most amazing resource out there http://www.matrices.net/fursuiting.asp Seriously, if you ever needed to know how to put together a whole fursuit or just parts of one, you should look at that website. There is so much useful hints and tips. Stuff like using hair clippers to shave the fur to get more shape and detail seems like common sense to me now but I wouldn't have thought to try it (or thought it was so easy) if it were not for the videos on that website.
Gushing out of the way, I used the tutorial for the fur hands on the Matrices Fursuiting website. I was having one of those days where I really wanted to work on something but felt I couldn't due to lack of some sort of materials... My remit from my friend was black faux leather pads on the paws. I ordered some but was sitting and waiting for it. I looked around the flat and found some very thin, dark dusty blue suede leather. This might do... These may not be paws for my friend but if I made a pair of my own, I can make all the mistakes on these and then do better for friend who bought the fur fabric for me in the first place.
So the furglove making continued. I drew out a rough palm-sized pad and cut it out of leather.
I was surprised my sewing machine could handle the fur fabric and the leather but it seemed fine. I didn't follow through on the tutorial exactly - I went for more of a loose zigzag stitch rather than a satin-style stitching. It still seemed to work out pretty good
I learned that it's a lot easier to tack down the pads before hitting the sewing machine. Also it leads to slightly less huge bunches of fabric, as the leather sneaks around against the fur which moves around quite a bit.
All sewn up and ready for some shaving. I am so thankful I've trained myself to be ambidextrous. I had no problem shaving either glove using either hand. Wearing the glove while shaving with the other hand allowed me to move my fingers around and get more shaping in between the fingers.
And here's both paws
Hopefully I'll be moving onto the furfeet sometime soon... I've basically got the materials together, it's just finding the time to collaborate with friend to make sure shoes fit and final design/shaping.
Sunday, November 18, 2012
Crayons On Canvas
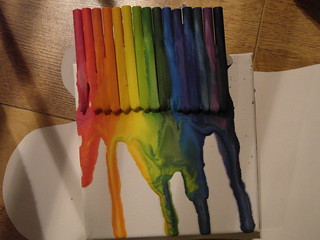
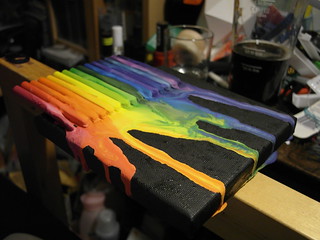
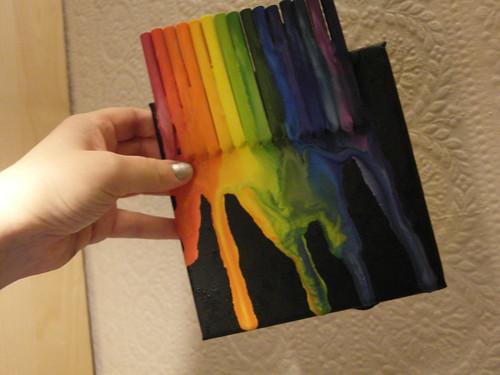
Cheap crayons, cheap canvas, glue gun, blow dryer on high plus some black acrylic paint for detailing. I wanted to keep the canvas white underneath in case the cheap crayons were lacking in pigment and turned translucent when melted.
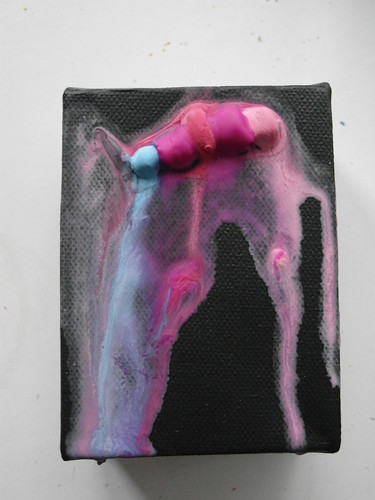
There does seem to be enough pigment in the cheap crayons to show up on a black surface but it's not nearly the same effect as using a white background and then painting around the dripped wax
Wednesday, November 14, 2012
Fire breathing
Warning: Post contains fire. Fire is dangerous. Apparently inhaling cornflour can cause lung infections too. Blow, don't suck :P
So... Instructables is a very bad influence. It's probably been my biggest influence this week. Into my inbox came a newsletter with a section called Projects for Pyros...
I had heard of using cornstarch (known as cornflour in the UK) for firebreathing before; I even had it in my project notebook from several months ago. Using Bonfire weekend as an excuse seemed as good as any to try this out with minimum attention.
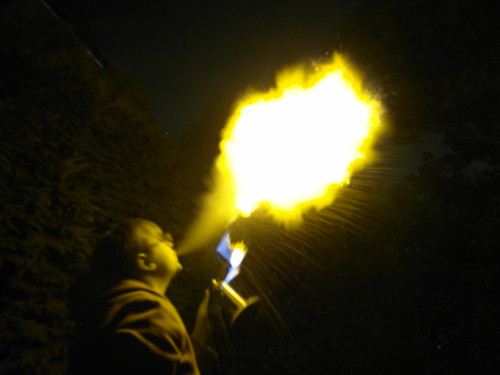
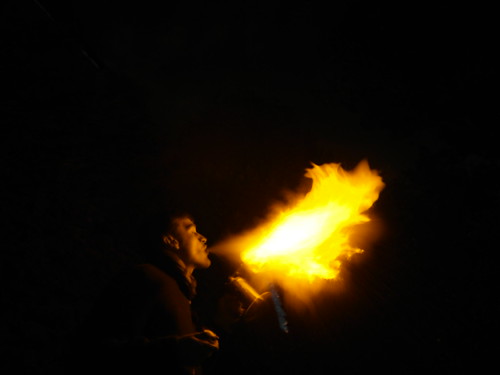
It's surprisingly easy to do, although it's a bit gross tasting and gunks up in your mouth but eventually dissolves. You stick a big spoonful of cornflour into your mouth and just blow out .... up and out, not down! Flames go up! - towards a lit blow torch. This would be the other fun use of a small blow torch, besides firing PMC (precious metal clay).
For some reason, this picture of my husband fire breathing is more popular than the pictures of me.
And here's a short video so you get the full noise effect.
So... Instructables is a very bad influence. It's probably been my biggest influence this week. Into my inbox came a newsletter with a section called Projects for Pyros...
I had heard of using cornstarch (known as cornflour in the UK) for firebreathing before; I even had it in my project notebook from several months ago. Using Bonfire weekend as an excuse seemed as good as any to try this out with minimum attention.
It's surprisingly easy to do, although it's a bit gross tasting and gunks up in your mouth but eventually dissolves. You stick a big spoonful of cornflour into your mouth and just blow out .... up and out, not down! Flames go up! - towards a lit blow torch. This would be the other fun use of a small blow torch, besides firing PMC (precious metal clay).
For some reason, this picture of my husband fire breathing is more popular than the pictures of me.
And here's a short video so you get the full noise effect.
Subscribe to:
Posts (Atom)